When it comes to towing a trailer, ensuring that your brakes are functioning properly is crucial for safety. How to adjust self-adjusting electric trailer brakes is a common question among trailer owners, particularly those who want to ensure their braking system is always performing at its best. In this guide, we will walk you through the process of understanding and adjusting self-adjusting electric trailer brakes to keep your trailer safe and road-ready.
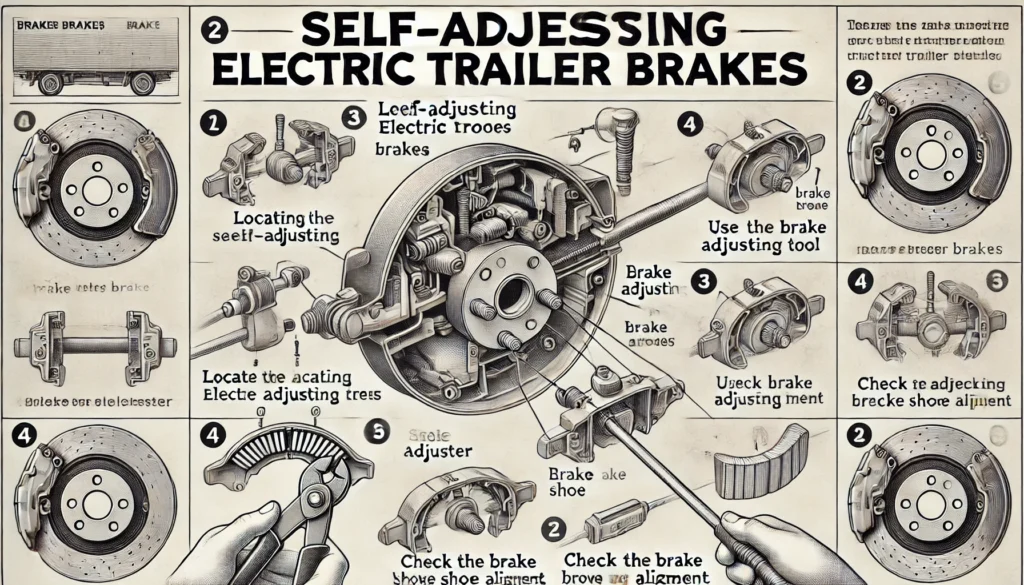
Understanding Self-Adjusting Electric Trailer Brakes
Self-adjusting electric trailer brakes are designed to automatically adjust the brake shoes as they wear down, ensuring that they maintain the correct distance from the brake drum. This feature reduces the need for frequent manual adjustments, making them a convenient option for trailer owners. However, understanding how they work and ensuring they are functioning properly is still essential.
How Do Self-Adjusting Electric Trailer Brakes Work?
These brakes use a mechanism that automatically adjusts the position of the brake shoes each time the trailer is in reverse. When you back up, the brake shoes are activated and, if there is enough movement, the adjuster mechanism clicks into place, moving the brake shoes closer to the drum. This process ensures that the brakes remain properly adjusted, providing consistent braking performance.
How to Adjust Self-Adjusting Electric Trailer Brakes
While self-adjusting brakes require less frequent manual adjustments, it’s still important to know how to check and adjust them if necessary. Here’s a step-by-step guide:
Step 1: Prepare Your Tools and Trailer
- Park your trailer on a flat, stable surface.
- Gather the necessary tools: a jack, jack stands, a brake adjusting tool or flathead screwdriver, and a flashlight.
Step 2: Lift the Trailer
- Use a jack to lift the trailer off the ground, placing jack stands under the frame for safety.
- Ensure the wheels are off the ground and can spin freely.
Step 3: Access the Adjuster
- Locate the access slot on the brake backing plate. This slot is usually covered by a rubber plug, which you’ll need to remove.
- Once removed, you’ll be able to see the star wheel adjuster inside.
Step 4: Rotate the Adjuster
- Using a brake adjusting tool or a flathead screwdriver, rotate the star wheel adjuster.
- Turn the adjuster until you feel a slight drag when spinning the wheel by hand. This indicates that the brake shoes are close enough to the drum for optimal performance.
Step 5: Check the Adjustment
- After adjusting, lower the trailer and perform a road test. Drive the trailer at a low speed and apply the brakes. The braking should be smooth and responsive without any jerking or pulling.
- If the brakes feel too tight or too loose, repeat the adjustment process.
Maintenance Tips for Self-Adjusting Electric Trailer Brakes
To ensure your self-adjusting electric trailer brakes remain in good working condition, follow these maintenance tips:
- Regular Inspections: Even though these brakes are self-adjusting, regular inspections are still necessary. Check the brake shoes, drums, and adjuster mechanisms for wear and tear.
- Lubricate Moving Parts: Apply a small amount of brake lubricant to the adjuster mechanism and other moving parts to ensure smooth operation.
- Check Brake Performance: Periodically test the brakes by towing the trailer and applying the brakes at different speeds. Listen for any unusual noises and feel for any inconsistencies in braking.
Conclusion
Self-adjusting electric trailer brakes are a fantastic feature that reduces the need for frequent manual adjustments. However, knowing how to adjust self-adjusting electric trailer brakes is essential for ensuring they perform correctly and provide the safety you need on the road. By following the steps outlined in this guide and regularly maintaining your brakes, you can enjoy worry-free towing with confidence.