Ensuring that your trailer’s electric brakes are functioning correctly is essential for safe towing. Whether you’re preparing for a long haul or just routine maintenance, knowing how to test electric brakes on trailer can help prevent accidents and maintain optimal performance.
Why Testing Your Trailer’s Electric Brakes is Crucial
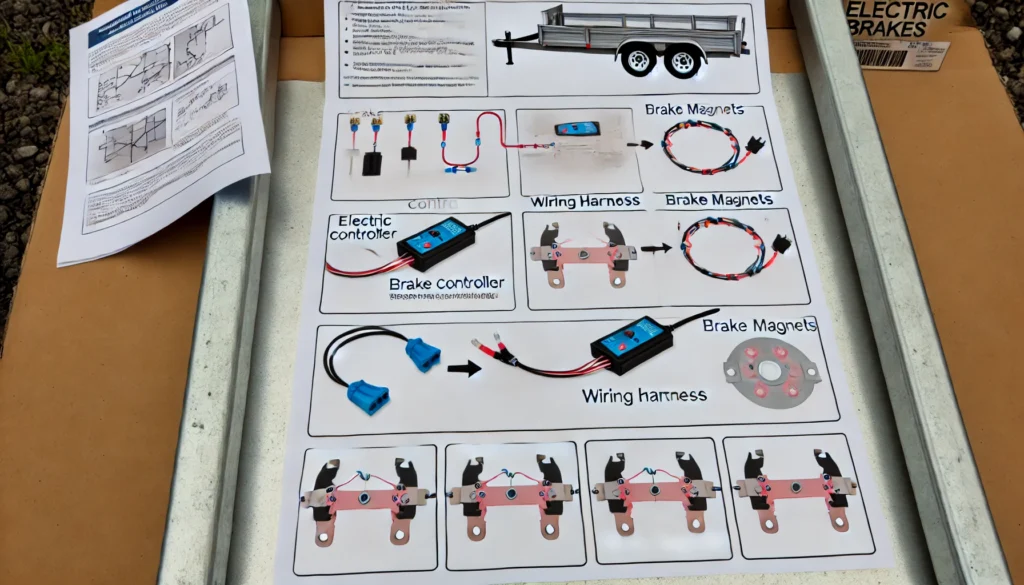
Electric brakes on a trailer are designed to provide controlled braking power, which is critical when towing heavy loads. Regularly testing these brakes ensures that they engage properly, deliver the necessary braking force, and respond accurately to your brake controller’s settings.
Tools You’ll Need
Before starting the testing process, gather the following tools:
- A multimeter for checking voltage and continuity
- A trailer brake controller or a test light
- A battery charger or an external power source (if needed)
- Basic hand tools like screwdrivers and pliers
Step 1: Visual Inspection of the Brake Components
Before you dive into testing, conduct a thorough visual inspection of the brake system. Look for any signs of wear, corrosion, or damage to the wiring, connectors, and brake magnets. Ensure that the brake shoes and drums are in good condition and free of excessive wear or debris.
Step 2: Check the Brake Controller
The brake controller is the brain behind your trailer’s electric braking system. Start by testing the controller to ensure it’s sending the correct signals to the trailer brakes. Connect the multimeter to the brake controller output wire, usually blue, and activate the controller. The voltage should increase smoothly as you apply more brake pressure. If the voltage is erratic or doesn’t increase, the controller may be faulty.
Step 3: Test the Trailer Wiring
To ensure that power is reaching the brakes, test the wiring harness that connects your vehicle to the trailer. Use a test light or multimeter to check for continuity and proper voltage at the trailer’s connector. If there’s no voltage, inspect the wiring for any breaks, corrosion, or loose connections.
Step 4: Test the Brake Magnets
The brake magnets play a critical role in engaging the brakes when power is applied. To test the magnets, first disconnect the trailer from the tow vehicle. Then, connect the multimeter leads to the brake magnet wires and check for resistance. A reading of 3.2 to 4.0 ohms is typical for most brake magnets. If the resistance is too high or too low, the magnet may need to be replaced.
Step 5: Conduct a Road Test
Once the components pass the initial tests, it’s time to conduct a road test. Connect the trailer to your vehicle and find a safe area to drive at a low speed. Gradually apply the trailer brake controller and observe how the trailer responds. The brakes should engage smoothly without locking up or pulling to one side. Adjust the controller settings if necessary to achieve balanced braking.
Step 6: Test the Emergency Breakaway System
The emergency breakaway system is a critical safety feature that automatically engages the trailer brakes if the trailer becomes disconnected from the tow vehicle. To test this system, pull the breakaway switch pin while the trailer is stationary. The brakes should engage fully and hold the trailer in place. If the brakes don’t engage, inspect the breakaway switch, battery, and wiring.
Conclusion
Regularly testing electric brakes on a trailer is essential for safe towing and peace of mind. By following these steps, you can ensure that your trailer brakes are in optimal working condition, ready to handle any load and road condition.