When towing a trailer, safety is paramount, and a crucial component of that safety is the braking system. For trailers with air brakes, integrating an air to electric trailer brake controller can provide the flexibility to operate electric brakes as well. In this guide, we’ll explore how these controllers work, their benefits, and how to install one on your trailer.
What is an Air to Electric Trailer Brake Controller?
An air to electric trailer brake controller is a device that allows a trailer equipped with air brakes to be compatible with electric brake systems. This is particularly useful when towing different types of trailers or when converting from an air brake system to an electric one. The controller converts the air pressure signal from the towing vehicle into an electric signal that activates the trailer’s electric brakes.
Benefits of Using an Air to Electric Brake Controller
- Versatility: Allows towing of different trailers with varying brake systems.
- Enhanced Safety: Provides reliable braking performance across different systems, ensuring the trailer stops smoothly and safely.
- Ease of Installation: Modern controllers are designed for straightforward installation, making it accessible even for DIY enthusiasts.
How Does an Air to Electric Brake Controller Work?
The controller works by sensing the air pressure from the vehicle’s air brake system. When the driver applies the brakes, the controller converts the air pressure signal into an electrical signal. This signal is then sent to the trailer’s electric brake assemblies, activating them in sync with the towing vehicle’s brakes. This seamless conversion ensures consistent braking power, regardless of the trailer’s braking system.
Step-by-Step Guide to Installing an Air to Electric Trailer Brake Controller
Step 1: Gather Necessary Tools and Parts
Before starting the installation, ensure you have the following:
- Air to electric brake controller kit
- Wiring harness
- Air pressure sensor
- Jack and jack stands
- Lug wrench
- Screwdrivers and pliers
- Wire connectors and electrical tape
- Wrenches and socket set
Step 2: Prepare the Trailer and Vehicle
- Park the trailer and towing vehicle on a stable, level surface. Secure both with wheel chocks.
- Use a jack to lift the trailer and place jack stands under the frame for safety.
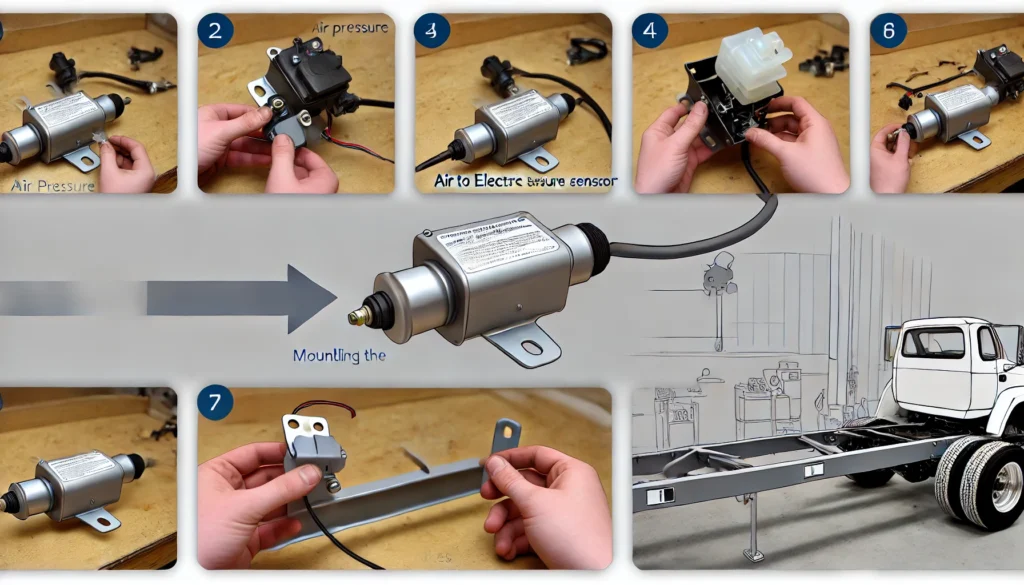
Step 3: Install the Air Pressure Sensor
- Identify the air brake line where the sensor will be installed.
- Cut the air brake line and insert the pressure sensor, securing it with clamps provided in the kit.
- Ensure the sensor is properly aligned and free of leaks.
Step 4: Mount the Brake Controller
- Mount the brake controller inside the towing vehicle, typically under the dashboard.
- Connect the controller to the vehicle’s electrical system and the air pressure sensor according to the manufacturer’s instructions.
Step 5: Wire the Electric Brakes
- Run the wiring from the brake controller to the trailer’s electric brake assemblies.
- Connect the wires securely, using wire connectors and electrical tape to protect the connections.
Step 6: Test the System
- With the trailer still on jack stands, manually spin the wheels and apply the brake controller to ensure the brakes engage correctly.
- Perform a road test at low speed to confirm the brakes are working smoothly.
Maintenance Tips for Air to Electric Brake Controllers
- Regular Inspections: Check the air pressure sensor and wiring for signs of wear or damage.
- Calibration: Periodically adjust the brake controller to maintain the desired braking force.
- Clean Connections: Ensure all electrical connections are clean and free from corrosion.
Conclusion
An air to electric trailer brake controller offers versatility and enhanced safety, making it a valuable addition to any towing setup. By following this guide, you can install and maintain your brake controller effectively, ensuring your trailer remains safe and road-ready for any journey.